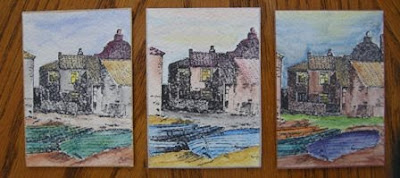
The ATC's that I did for a swap. I decided with my new found skill of water coloring I would give it a try. I stamped the watercolor paper with black StazOn. Once dry, I used my watercolor pencils and a REALLY small brush. Also used one of those "water brushes". I probably should have photographed them seperately but didn't. Maybe next time as it is rather hard to tell some of the differences.
Welcome to My Stamping Soiree! Feel free to roam at your leisure and have a good time!..."The World Is But A Canvas To The Imagination" - Thoreau
Saturday, July 24, 2010
Watercolor Pencil Week 9 - 12
Week 9 - and the end is coming nearer and I don't want it to because I'm learning so much. This week we learned about shading. Our project was to do the tulip. As an added "fun" project we did our own version of a sample that was provided. So below is my version of "Castle of Dreams."


 Week 10 - we were to finish our "Daisies". We had drawn them in a earlier lesson and learned about "masking". We used masking fluid to cover them so that we would do the background and add the water to the vase. This is my finished product.
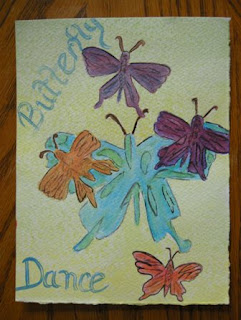
Week 11 - and we were left to our own devices. So I began with "The Nest". I went back and redid a picture that we did in the beginning. If you go back to an earlier lesson you'll see the first one I did. Some improvement but as with anything "practice, practice, practice!" The next picture I did was the same method when I did the "fish". This time I went for the desert. I think my cactus needs a little work. I never said I could draw! The 3rd picture I thought I would attempt a birdhouse in a tree. The more I drew the tree the more it looked like something under water. Went with fish. Again. The last picture of the butterflies was a little more involved since I used some masking technique but it was a lot of fun.
Week 12 - and sadly at an end. It was such a good time and I learned a lot. We didn't really have a project to do so I decided to take some of the things I learned plus some suggestions given and put them together. I did "pouring, saran wrap, candle resist technique". I only wish I had gone a little darker in color.
And that my friends was my watercolor pencil experience.
Friday, July 23, 2010
Watercolor Pencil Class Weeks 5-8
Moving on with weeks 5 - 8, the 5th week found us doing more techinques. We created a wash then added salt or saran wrap to it. We let it dry and removed the salt and saran wrap to see what kind of impressions they made. What you see is my "salt impressions". Next we got to add a background to our butterfly picture we had already done. I chose to use salt again.


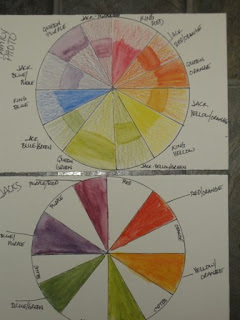
Week 6 - found us learning our colors or rather how to mix them to get more colors. It was explained to us a Kings (primary colors), Queens (secondary colors), Jacks (tertiary colors) and then a "family" picture. It was fun learning how to mix colors from just the first three (red, blue and yellow).


Week 7 - we broke down our colors into cold and warm. We had to paint our bears using only those colors.


Week 8 - and we got to do this really cool picture where we took our paper and tore it into strips. Then we did a wash in varying shades of a color on each strip. After they were dry we taped them to a piece of watercolor paper. The sample we had was of birds in the sky. I chose to use a blue and the more I made my different shades the more I decided it looked like "ocean". So I did fish and added the birds.


Online Watercolor Pencil Class Weeks 1-4
One of the groups that I belong to, ARTISTS OF THE ROUND TABLE, always has something exciting going on. They have some really good workshops where you might complete lessons from a book and usually the author of that book becomes a part of the "group" so as to help out and offer suggestions. I thought I would give the watercolor pencil class a try. It was a 12 week course and the materials were provided to us by the "artist/teacher" Marilyn Harris-Miller aka Maer from Canada. I think I will break this into 3 posts. So here are some samples.
 Week 1 - learning about brushes, pressure when coloring and just getting used to the "equipment".
Week 2 - learned about techniques. This sample is using "dry on dry". Then we tried our hand at a birdhouse.

Week 3 - learning the "dry on wet" technique. Then we moved on to doing a bird's nest.

Week 4 - we learned the "wet on dry" technique. We got to do a butterfly.

 Week 1 - learning about brushes, pressure when coloring and just getting used to the "equipment".
Week 2 - learned about techniques. This sample is using "dry on dry". Then we tried our hand at a birdhouse.

Week 3 - learning the "dry on wet" technique. Then we moved on to doing a bird's nest.


Week 4 - we learned the "wet on dry" technique.
 We got to do a butterfly.
On Being So Quiet
WOW! Couldn't believe how long it has been since I last posted....Well, a lot has been going on....Had to have left wrist surgery (right handed...yeah!) so that put a minor crimp in things....Wasn't anything major and it wasn't carpel tunnel...it was diagnosed as (are you ready!) Dequervain's Tenosynovitis...here's the "official" explanation compliments of Mayo Clinic: "a painful inflammation of the tendons on the wrist side of the thumb. Pinching, grasping and other movements of the thumb aggravate the pain."....tried therapy for about 6 weeks but it just didn't work....had the surgery and working just fine..!
And yet another reason for being absent: we moved....I wanted a bigger kitchen and ended up with a whole new house!...Plus the master bedroom is on the first floor....So here's a picture of my new kitchen (before moving  in)
in)
 in)
in)
The view out this window is down to the lake!...Yes, we have lake front property!..I love sitting at my kitchen table and looking down at the water....Next is a view of the porch and deck...Love it!....Of course can't really enjoy the outside as much with the 100+ degree weather....but we did get to on the 4th of July....
I did take an online watercolor pencil class while doing all this....That'll be my next post...
Subscribe to:
Comments (Atom)


